


The art of creating a beautiful wall gallery
How to create a beautiful, balanced and harmonious wall gallery in your home

Hi, I’m Peggy. I’ve been passionate about home and interior design my whole life—I even used to make houses out of cardboard and my Magic Tree House was my most precious possession when I was little! I’m currently studying Interior Design at the British Academy of Interior Design, and this is where I share my stories and passion.
If you're an interior design professional or an enthusiast, I also write over at The Interior Designer Corner, where I’m currently hosting the Mood Board Challenge—with much more to come. My hope is to build a beautiful, supportive community of interior designers who want to grow with the helping hands of like-minded friends.
Who doesn’t want their home to look like an art gallery? Kidding—I know some people don’t. However, if you’re still here, you probably know how much I value art, colours, and eclecticism, so I’m betting my bottom dollar that you love a well-curated gallery wall as much as I do.
Creating a balanced and harmonious gallery wall isn’t always easy, especially when you’re starting with a blank wall and a few prints or paintings. So today, let’s talk about what makes a beautiful gallery wall and how you can create one in your own home.
First things first, let’s talk about the style of your gallery.
There are a few things to consider before you begin:
The room’s surroundings – Do you have a colour scheme or a particular style of art you’d like to stick to?
Existing artwork – Do you already have prints or paintings you want to use? Could they serve as a starting point or a focal piece?
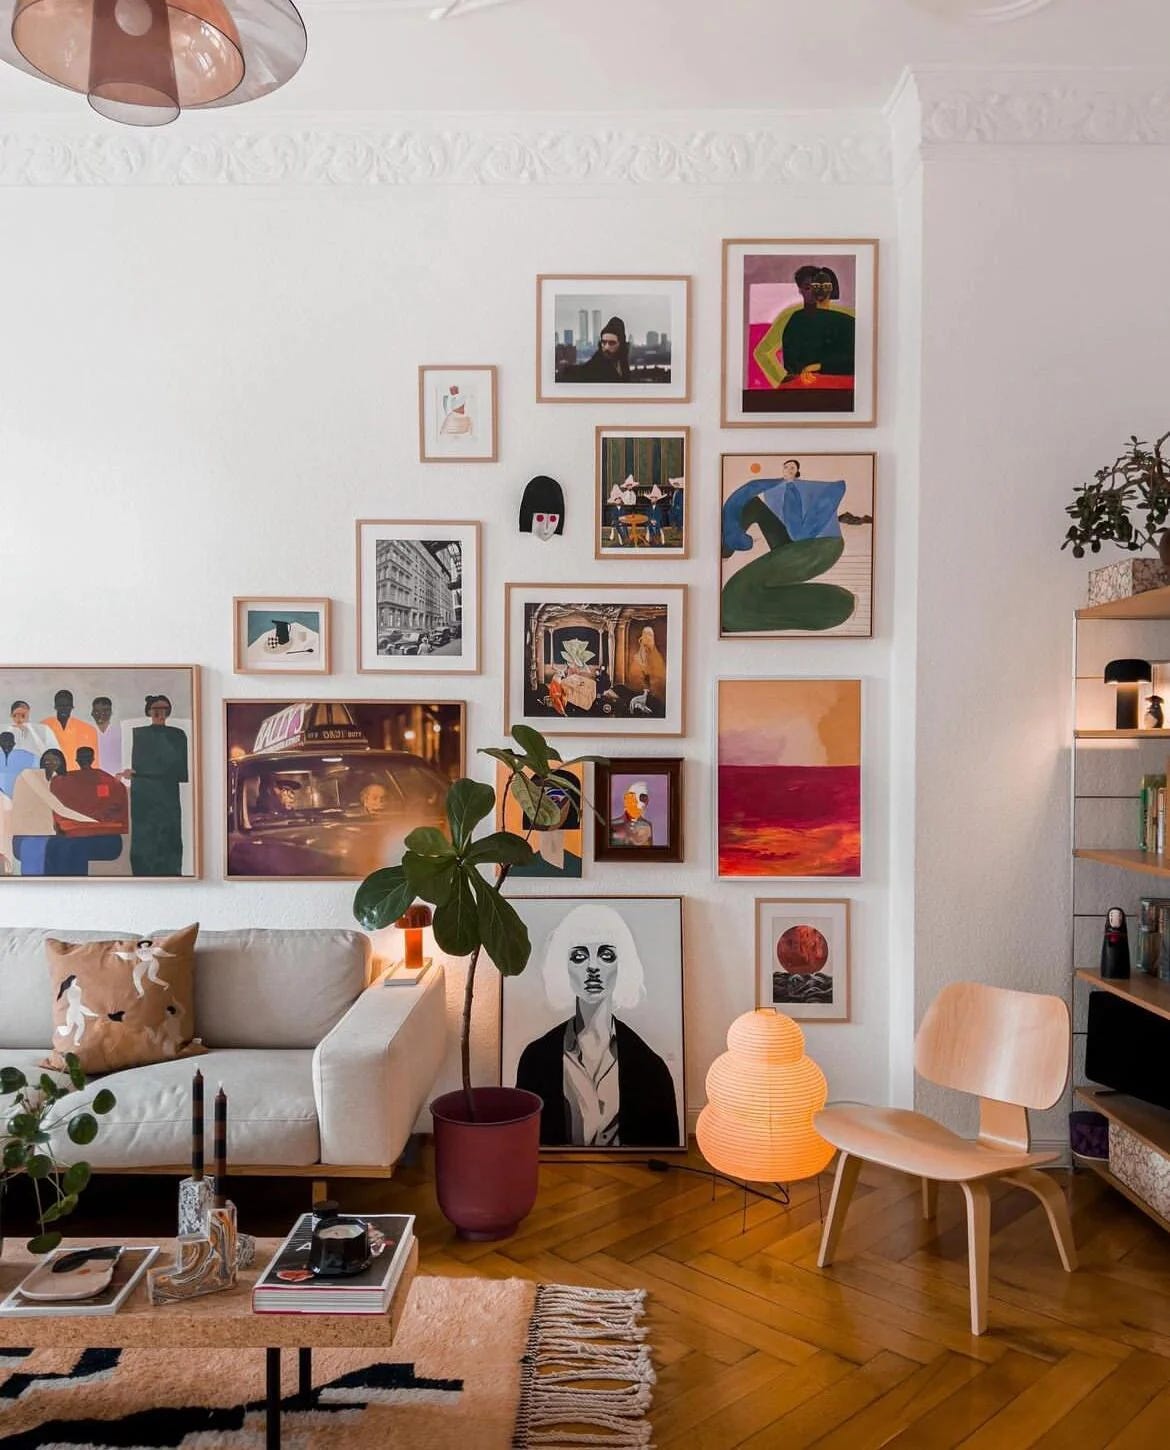
Mixing media – Do you want to stick to wall art, or would you like to incorporate other decor elements such as decorative plates, neon light signs, wall hangings, or small sculptures?
Thinking about these elements in advance will help you curate a gallery wall that feels intentional and cohesive. With this in mind, shop or thrift for additional paintings and wall art that complement your vision, ensuring a well-balanced display and a gallery you will love.

Plan your gallery
Once you know what is going up on your wall you will be ready to plan your gallery.
Before your art goes up on the wall, you need to figure out how to arrange it. I recommend laying everything out on the floor first to see how the pieces fit together.
I find that starting with the focal piece makes the process much easier, as you can then arrange the other pieces around it.
There are different ways to structure your gallery wall:
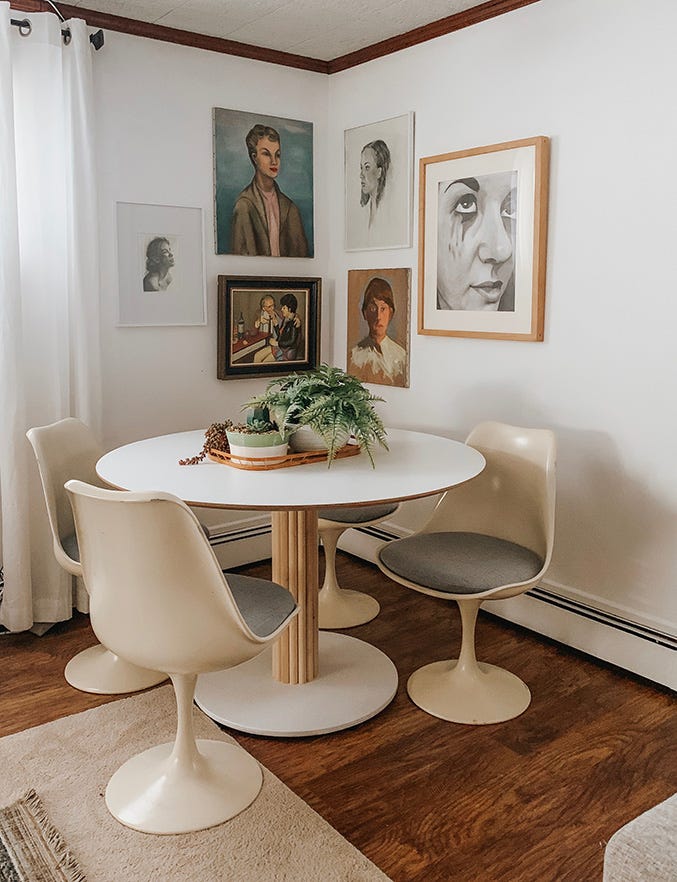
If all your frames are the same size, you can align them neatly for a clean, formal look.
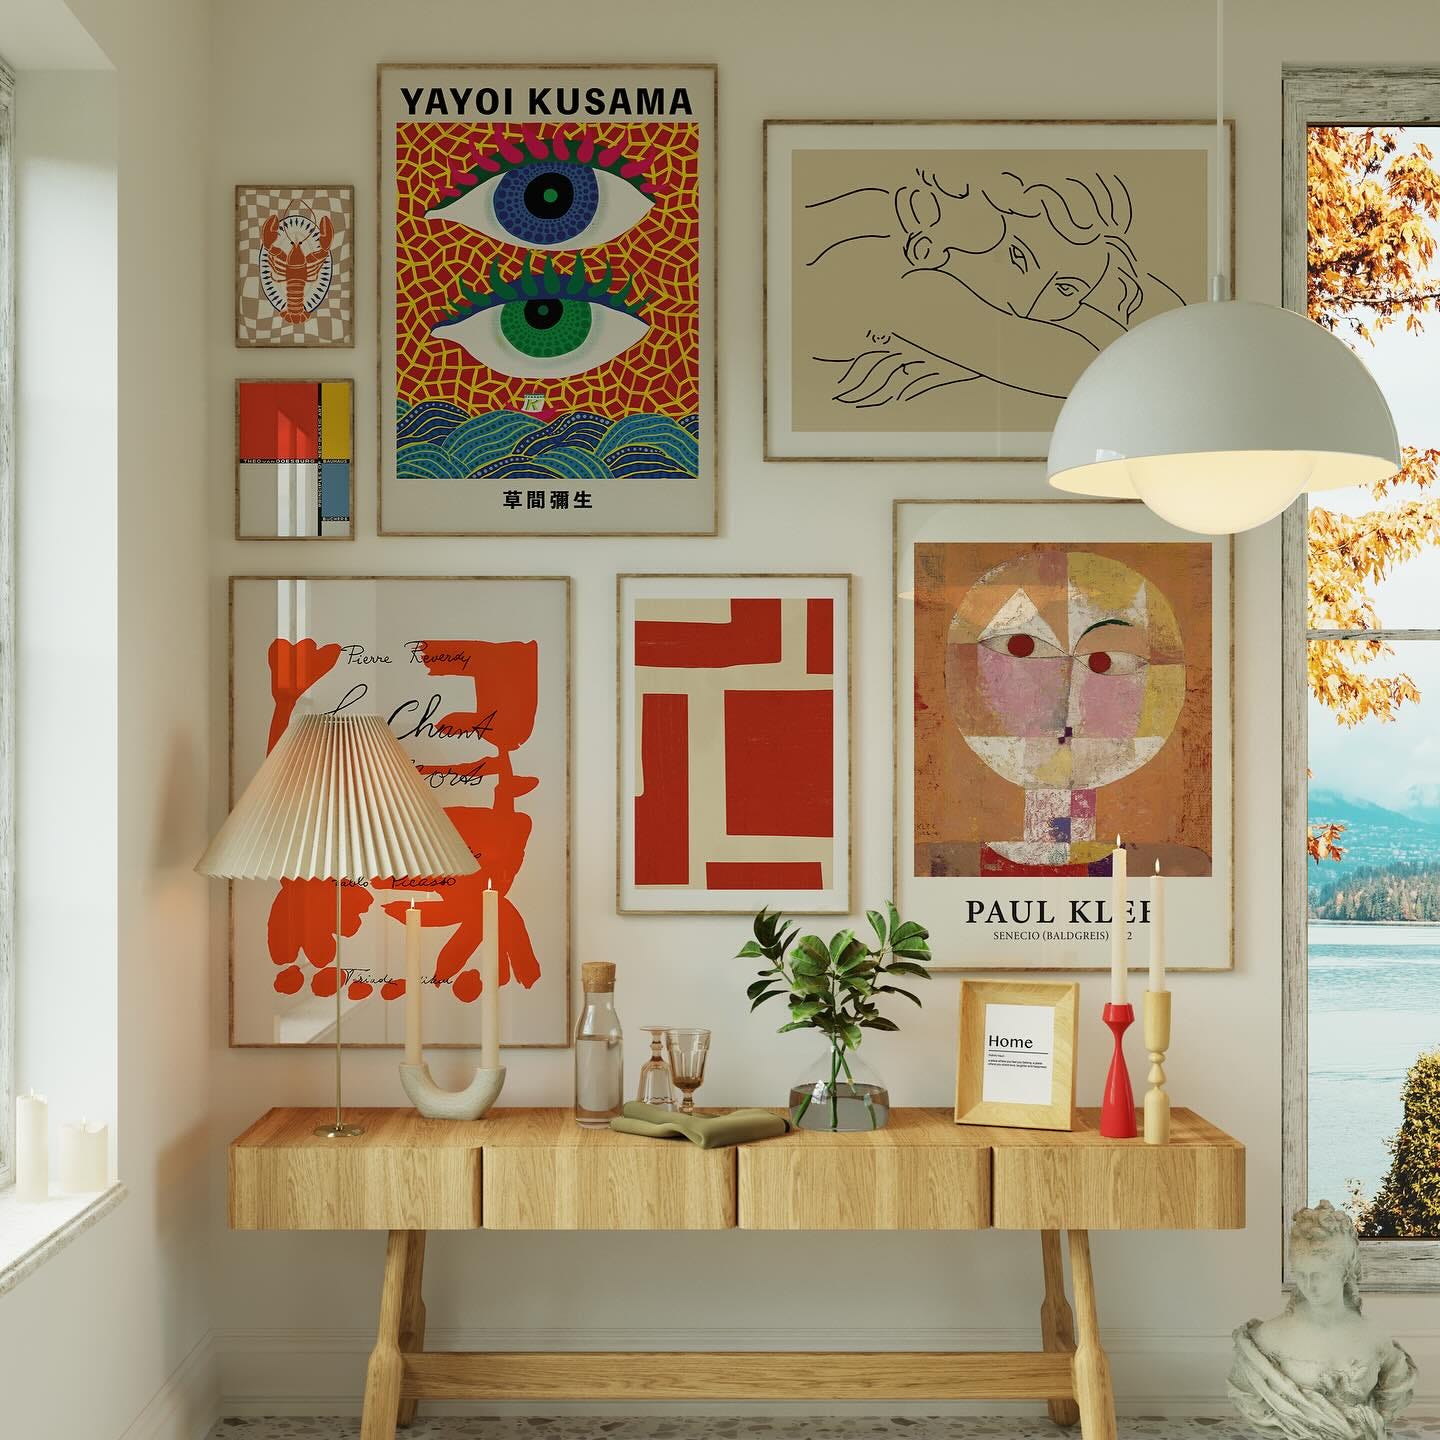
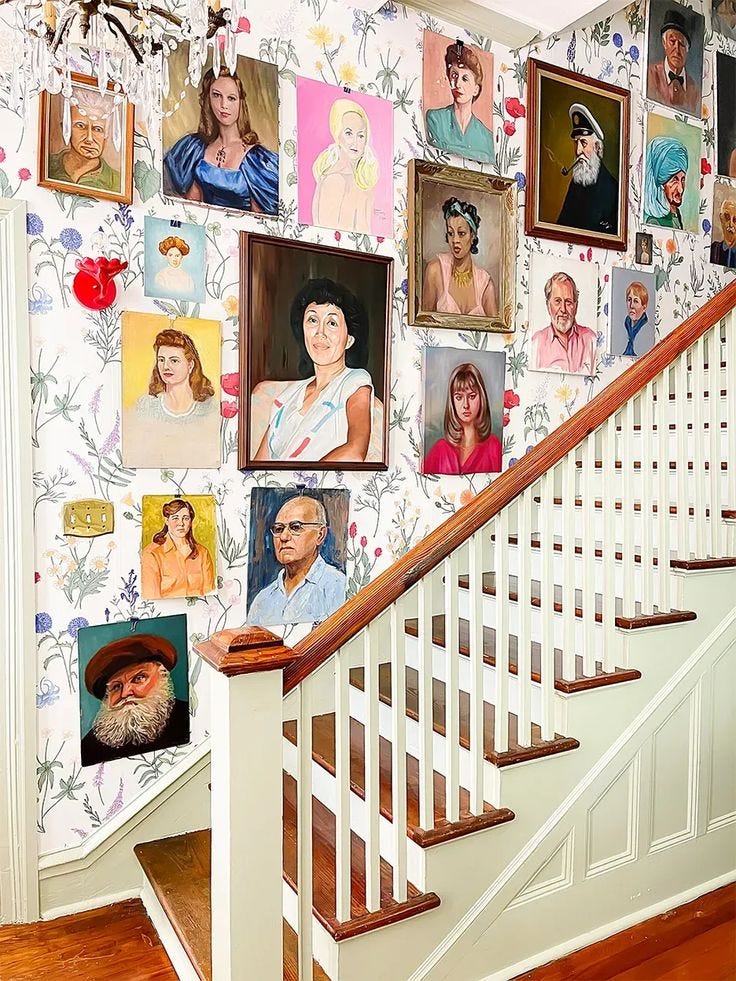
If your frames vary in size and style, start with your focal piece in the centre and build around it. Pay attention to filling large gaps and ensuring the colours are distributed evenly—avoid clustering similar tones on one side while leaving the other unbalanced.
If you’re incorporating objects like decorative plates or sculptures, make sure they have designated spaces within the layout when you arrange everything on the floor. This will help you achieve a balanced and visually interesting composition before you start hanging.
Remember to allow for some breathing space and maybe leave between 2 to 4 inches consistently between each piece of art.
Install your gallery
Once you've arranged your art pieces on the floor and are happy with the layout, here’s how to transfer them to the wall smoothly and accurately:
Take a photo of your layout – This is an essential step. As you start moving things around, it’s easy to forget your original arrangement, so having a reference will save you time and frustration.
Create paper templates – This step is highly recommended. Use craft paper to trace each piece of art, then cut it out. Label each template to avoid confusion. To make hanging even easier, flip each piece of art over and measure where the hook or wire sits, marking it on the template.
Position your templates on the wall – Use masking tape or painter’s tape to secure the templates to the wall. These tapes are easy to remove and won’t damage your paint.
Start with the central or largest piece – Place it first, then build your display outward. Keep a consistent gap of 2 to 4 inches between each piece to ensure a balanced look.
Double-check the alignment – Step back and assess the layout. Make sure everything feels balanced, level, and harmonious before you commit to hanging.
Get ready to hang – Ensure you have the right hardware for each piece based on its weight and frame type and use the markings on your craft paper to know where to fix your hardware.
Final step: Admire your work! – Take a step back, soak in the beauty of your new gallery wall, and give yourself a well-deserved pat on the back. You’ve done it, well done!